Beyond the extra mile- New Home Sewing Machine Journey
Corinne
6/8/20264 min read
Beyond the Extra Mile: Restoring a Mismatched WWII New Home (With a Surprise Upgrade!)
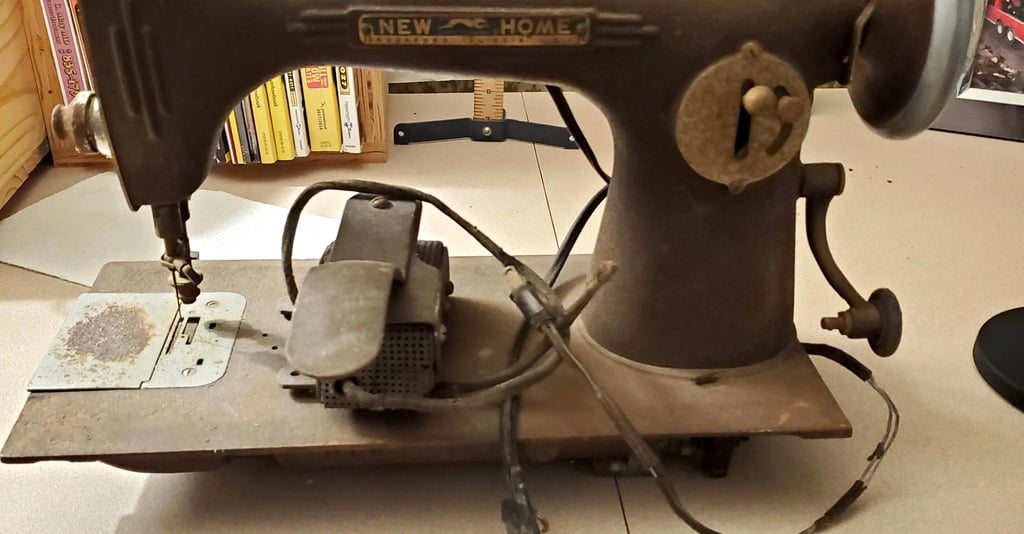
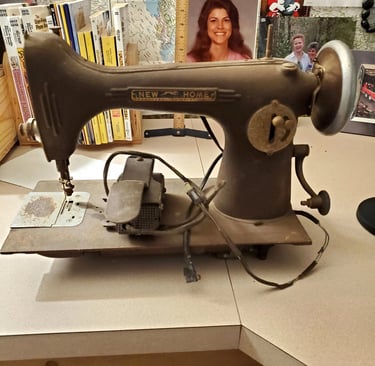
Every now and then, a machine comes into our workshop that demands we throw out the standard playbook. That was exactly the case when a customer trusted us with a deeply sentimental piece of family history: his mother's World War II-era New Home sewing machine, which he had rescued from a shed.
To say this customer is dedicated is an understatement—he actually made the long drive from Orange, Texas to our shop two separate times. The first trip back in January was to drop off his mother's treasured machine. The second trip was after he successfully hunted down and won an identical model online to serve as a donor machine, driving all the way back just to hand-deliver it so we would have every single part needed for a perfect restoration.
We are finally getting down to the painting stage on this heirloom, but getting to this point has been an absolute masterclass in patience, precision, and multi-stage prep.
The Chaos of Wartime Metals
Machines manufactured during the WWII era are historically fascinating, but they are notoriously difficult to restore. Because premium iron and steel were heavily rationed for the war effort, domestic manufacturers had to get creative. They used whatever scrap and mixed alloys they could get their hands on.
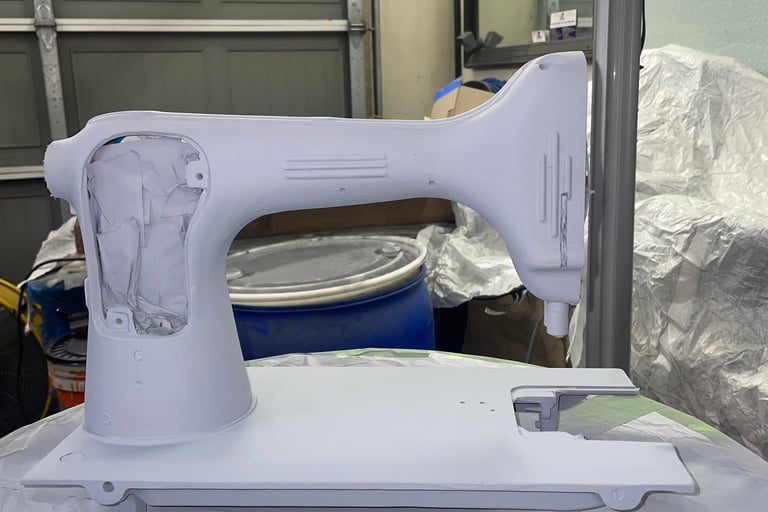
The result? This single sewing machine is a chaotic puzzle of different metals. It features a cast-iron body, an alloy and zinc wheel, and a steel plate in the back. Because the factory was working with such compromised materials back then, the casting is incredibly porous and uneven—bumpy in some places, smooth in others, and generally a total mess.
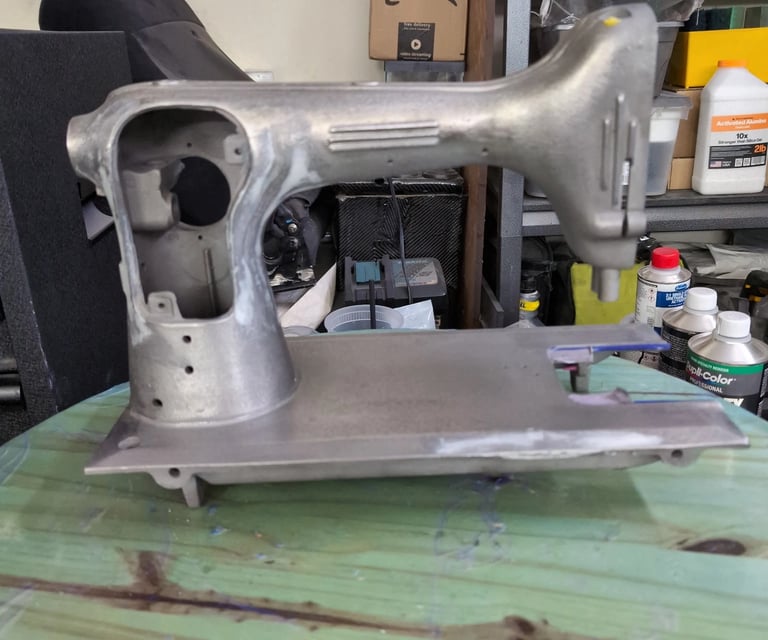
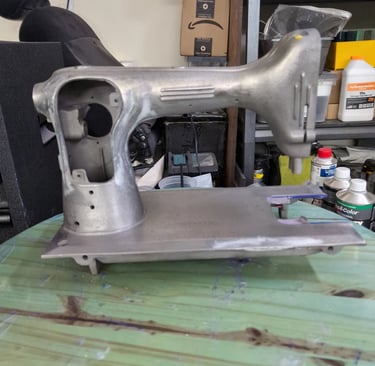
Taming the Casting with Evercoat
We knew that if we wanted this machine to turn out just as flawless and mirror-perfect as our previous projects, we couldn't just slap paint over those factory flaws. If you don't take the right precautions with metal this porous, you're just asking for solvent entrapment and bubbling down the road.
My fiancé made the executive decision that this wartime classic deserved a completely smooth, high-end, premium finish. To achieve that, he brought out a secret weapon from the automotive restoration world: Evercoat Body Shop Pro-Grade Glazing Putty
Before any primer could even touch this machine, he used the glazing putty to meticulously fill in the deep factory low spots, pinholes, and porosity in the raw metal. If you look closely at the raw metal body, you can see exactly where the putty was worked into the imperfections to level everything out.
But he didn't just stop at the main body.
A Surprise Labor of Love (and a Workshop Debate!)
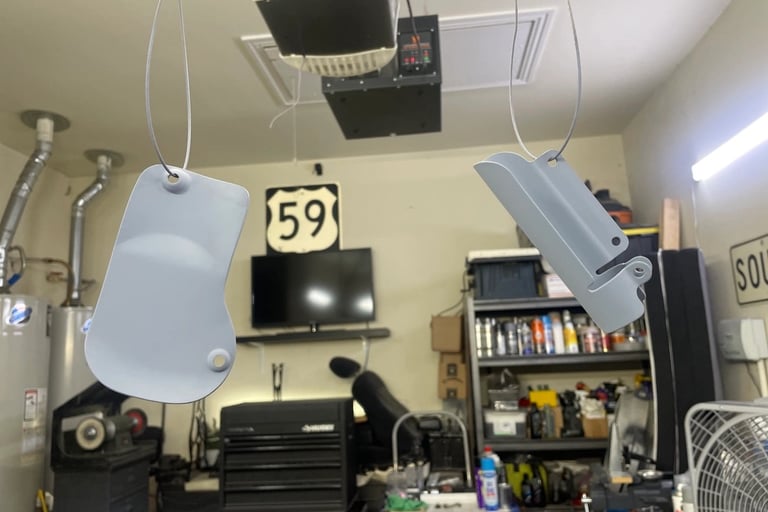
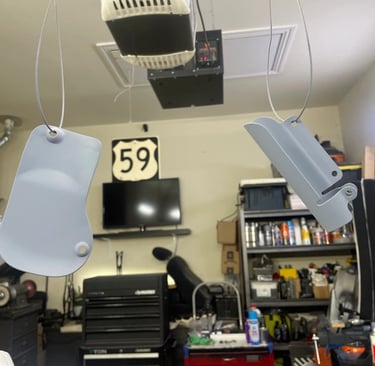
Here is the thing: if the main body is smooth as glass, leaving a rough, bumpy factory texture on all the smaller parts just wouldn't look right. The motor, the light hood cover, the bobbin winder—they all need to look like they belong to the same luxury machine.
Honestly, when my fiancé first suggested doing all this extra work, I kept telling him, "No, don't do that!" As a business owner, you have to protect your time and realize the customer didn't ask or want to pay extra for a level of detailing that wasn't strictly necessary. But my fiancé is an absolute perfectionist. He couldn't stand the thought of this heirloom leaving our shop looking anything less than unified.
In the end, his stubborn passion for craftsmanship won the argument! To thank this customer for his incredible dedication and for making that drive from Orange twice, my fiancé is donating his time, extra labor, and materials as a surprise gift. He has been painstakingly smoothing out the bobbin winder, the motor housing, and the light hood cover completely for free.
Step Two: The Etching Primer
Once the glazing putty was sanded flush, it was time to lock it all down. Because we are dealing with a cocktail of different metals (zinc, alloy, steel, and cast iron), a standard primer just won't cut it. You need something that chemically bites into the surface.
Enter the professional etching primer. This specialty coating ensures maximum adhesion and creates a perfectly uniform, rust-resistant barrier across every single piece. Look at how gorgeous and matte all the small components and the main body look once that etching layer is down!
The Next Step
This project has been a true test of patience since it arrived in January, but all that meticulous prep work is about to pay off. Now that our foundation is rock-solid and beautifully smooth, my fiancé is finally heading into the booth this week to lay down the very first coat of actual paint!
We can't wait to see the color hit the metal. Stay tuned for the final reveal—this wartime beauty is going to be one for the history books!


Contact
Book your sewing machine repair or restoration appointment today!
Phone
© 2026. All rights reserved.